
A belt that holds cartons on a level conveyor may allow the same cartons to slide backward on an incline. Adding cleats can help, but choosing a height from a catalogue without checking product dimensions, the return path or discharge clearance can create a new installation problem.
Specify a cleated conveyor belt as a complete belt assembly, not a flat belt with attachments added later. Start with the conveyed product and incline or spacing function, then define cleat profile, height, pitch, sidewall layout, base-belt construction and finished joint. Check every pulley, return support and transfer before approving the belt for production.
For OEM engineers and replacement-belt buyers, the practical question is not simply whether cleats will move the product uphill. It is whether the finished belt, cleats and any sidewalls can follow the actual conveyor route and deliver products at the next station without unacceptable interference or contamination.
What Is a Cleated Conveyor Belt?
A cleated conveyor belt carries transverse or otherwise arranged raised profiles, sometimes called flights or baffles. These features can help limit rollback on an incline, form regular spaces between products, or hold loose items in defined zones. The belt body still transmits the required pull and must fit the conveyor’s supports, pulleys, tracking arrangement and installation method.
There are several different engineering problems behind a request for “more grip.” A raised-friction carrying surface may help a package maintain contact with the belt, while a cleat provides a physical feature against which the package can rest. Sidewalls address lateral containment rather than the same function as a transverse flight. These options should not be substituted for one another without checking the product’s shape and movement. The broader belt conveyor components and belt selection guide explains how support and pulley arrangements interact with the finished belt.
Dorner’s cleated belt conveyor solutions overview describes incline handling, product spacing and sanitary conveying as common uses. Those are useful starting points, but a belt-only replacement inquiry needs considerably more detail than a complete-conveyor solutions page.
When Are Cleats Better Than a Flat or Patterned Belt?
Choose the function before the profile. If sealed cartons slide back when the incline starts, record the incline, package condition, start-stop cycle and belt surface. A proposed transverse cleat may provide a positive support point, but the final arrangement must also allow the carton to leave the belt at discharge.
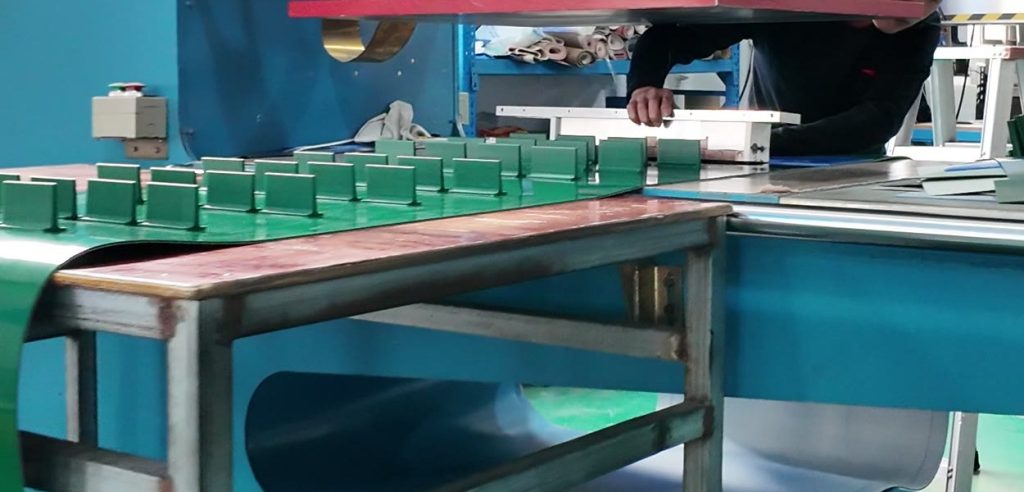
For loose small parts, the requirement may be reliable product separation rather than steep conveying. Regularly spaced flights create zones, but their useful volume depends on the gap, item geometry, belt width and loading method. For wet or free-flowing material, containment and cleaning access can become as important as incline performance.
Cleats are not automatically the best solution. They can complicate cleaning, require additional return clearance and make a conventional scraper or transfer unsuitable. If a flat or patterned belt already meets the actual handling duty, a profiled construction needs a clear engineering justification. Conversely, trying to solve repeated rollback with more belt tension can miss the product-to-belt interface entirely.
Cleat Types: Straight, Angled, Scoop and Custom Profiles
Straight transverse cleats
Straight flights run across part or all of the carrying width. They can divide products into regular spaces and resist backward movement on an incline. The selected profile requires a stated height, thickness, base geometry and distance from each edge. A full-width cleat may interact differently with guides and sidewalls from a shorter cleat that leaves open edge zones.
Angled, curved and scoop profiles
An angled or scoop-style cleat can be considered where the conveyed material needs a different supporting pocket or release behavior. Geometry must be chosen around material size, flow and cleaning requirements—not because one profile is universally better on a steep incline. Some patterns also introduce demanding return-roller contact or local bending requirements.
Flexco’s cleat pattern, height and spacing guidance explicitly links profile pattern to return-roller support and makes assumptions about the material’s angle of repose. Its charts and pulley limits are conditional on its own belt and conveyed-material context; their dimensions must not be transplanted into an LKBELT light-duty PVC or PU belt specification.
Customized heights and placements
A profile’s appearance does not confirm its suitability for a given machine. Some applications require asymmetrical pitch, a deliberate unprofiled section near the joint, or different cleat positions to match a sensor or feed point. Document every departure from a regular pattern on an approved drawing. Avoid ordering “standard cleats at equal intervals” when the machine was designed for a different indexing cycle.
How to Specify Cleat Height, Pitch and Pocket Size
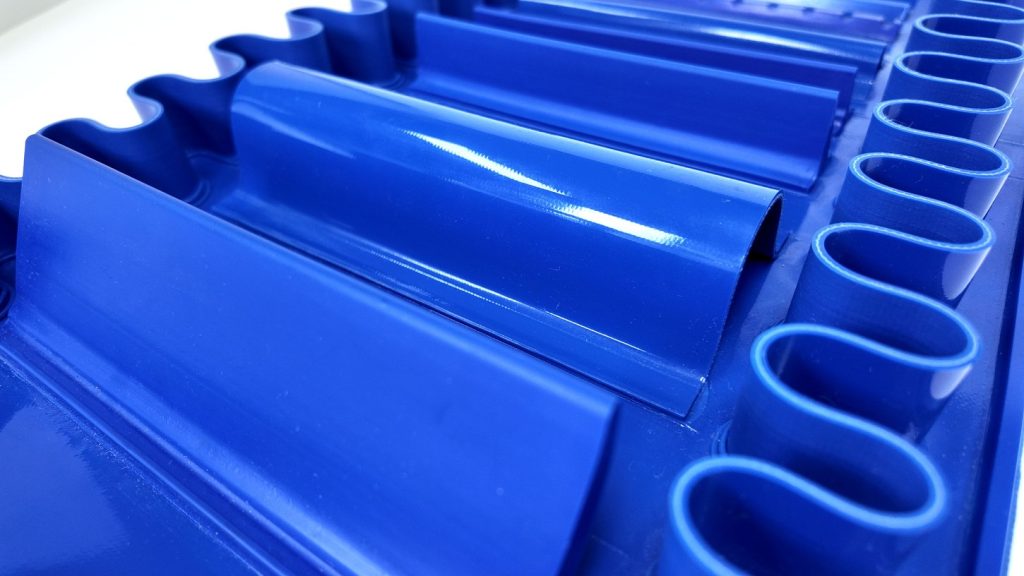
Cleat height is the projection above the belt’s carrying surface. Cleat pitch is normally recorded between corresponding reference points on successive cleats; the clear opening is a separate dimension. A drawing must state the chosen datum, especially for sloped or irregular cleat profiles. For a sidewall belt, the space available to the product is also limited by the internal width between sidewalls and by the cleat’s profile.
Begin with a representative product or material sample. Record the smallest and largest dimensions, typical orientation, mass or bulk behavior, and any tendency to roll, bridge, smear or adhere. Then establish the required product space on the belt and the intended loading and discharge pattern. At the receiving end, verify whether a cleat can pass a chute, transfer, guide or sensor without striking it.
For a replacement, photograph the original cleats and record their height, width, thickness, pitch, edge offsets and angle relative to the travel direction. Also record how the first cleat is positioned relative to the belt joint. An original pitch may be important to product dosing or upstream timing even when a revised spacing seems better for capacity.
On the fabrication drawing, identify the travel direction, cleat datum, first-cleat offset from the joint and any attachment-free splice zone. Verify whether the layout repeats correctly around the finished endless length; a nominal pitch that does not close on the loop may require a deliberately specified final gap.
Do not select pitch solely from a desired hourly throughput calculation. The number of usable pockets, fill level, speed, stop/start behavior and discharge success all affect the result. A useful comparison requires a representative operating trial or an equipment-approved calculation, not an invented universal cleat-spacing formula.
Cleated Belts With Sidewalls: Define the Whole Pocket
Sidewalls can help hold material within the belt’s edges, particularly on inclined applications. They add dimensions and flexibility requirements that a flat cleated belt does not have. A sidewall profile is not the same specification as the entire assembled belt.
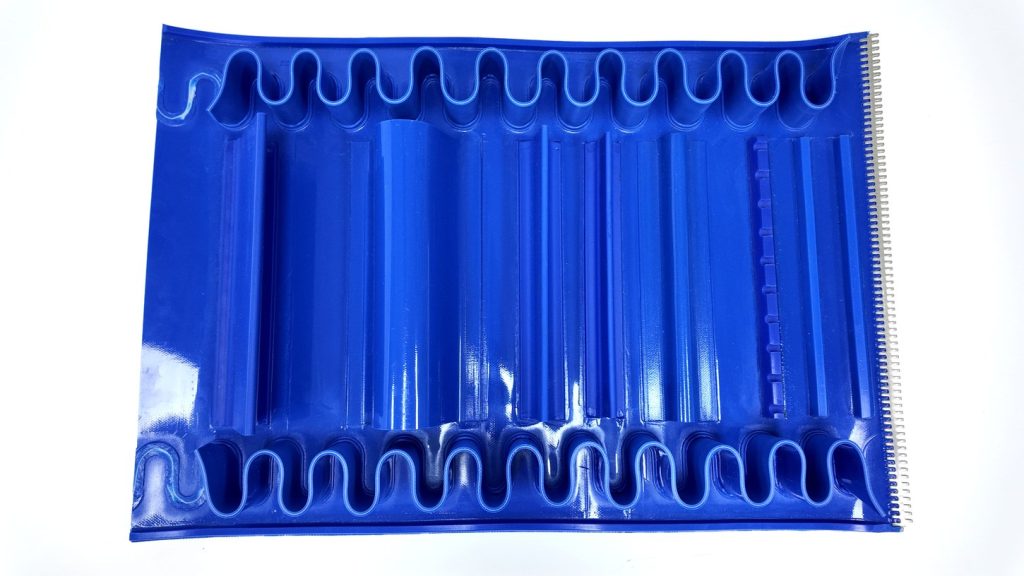
The LKBELT blue PVC belt with corrugated sidewalls and cleats is a relevant first-party example. Its public page shows a blue carrying face, corrugated sidewalls and transverse cleats. The order specification calls for the base-belt grade and dimensions, cleat height and pitch, sidewall position and the clear width between sidewalls. The product page also lists separate sidewall component ranges. For example, the LKV35 PVC sidewall row lists 35 mm height and an 80 mm minimum diameter, while the LU35 PU sidewall row lists 35 mm height and a 50 mm minimum diameter. These published component values are not approvals for the complete cleated belt, its splice or the buyer’s entire pulley route.
LKBELT also shows a white PVC conveyor belt with sidewalls and cleats. Its photos illustrate the pockets formed by the transverse flights and corrugated edges. The white color and “food grade” words in the page title are not themselves evidence that a particular finished assembly satisfies a specific country’s food-contact rules.
Measure overall finished width and usable pocket width separately. The available capacity is reduced by sidewall thickness, cleat bases and any required edge clearance. The sidewall folds and attachments also have to pass the return path and the smallest contacted pulley without exceeding the approved bending requirements. Check how material exits the final pocket; a belt that carries product securely uphill can still fail at discharge if its sidewall or cleat interferes with the outlet.
Base-Belt Construction, Attachments and Joint Compatibility
A custom cleated assembly combines several choices: base material, reinforcement, underside, cleat material, attachment method, joint, tracking features and final dimensions. PVC and PU describe material families, not complete strength, cleaning or minimum-pulley specifications. Where LKBELT offers belt accessories including cleats and guides, the buyer still needs a specific drawing and supplier confirmation for the selected construction and attachment process.
Attachment bond and working load
The cleat must withstand forces imposed by the actual transported product and its duty cycle. Inspect the transition at the cleat base and ask how the proposed attachment is produced and evaluated for the offered belt. Dorner describes radio-frequency welding as part of its own cleating process; that statement does not establish that every belt supplier uses the same proprietary process or meets identical weld and hygiene performance.
Pulleys, reverse bends and the return path
Trace the complete loop. Record the drive and end pulleys, backside idlers, small transfer rollers, support bed and take-up. A flight can clear a large drive pulley but interfere with a low return roller or protective cover. Reverse bends may place the attachment side in contact with components that a plain belt would pass. Obtain the approved finished-assembly bending limits, not just a catalogue minimum diameter for the base belt.
Splice and finished endless length
Cleats placed close to a joint may affect the available joining method, local flexibility and installation access. Specify any required attachment-free joint zone, the joint’s position relative to the cleat pattern and the inspection procedure. The conveyor belt splice types guide provides the general joining framework; only the chosen complete cleated construction and machine geometry determine an acceptable joint here.
A second measurement trap is confusing conveyor frame length with the belt’s finished endless loop length. Include the entire belt path and the take-up position when recording the original assembly. Changes to pulley layout or a different cleat return can require a new fit review, even if the carrying length appears unchanged.
Cleated Conveyor Belt Selection Checklist
| Design decision | Information to record | Common ordering risk | Required confirmation |
|---|---|---|---|
| Handling function | Incline, product spacing, rollback or containment | Ordering a flight for a problem that needs surface grip or side guides | Equipment handling objective and actual product |
| Cleat geometry | Profile, height, thickness, pitch, angle and edge offsets | Unusable pocket size or interference at discharge | Approved dimensioned profile drawing |
| Sidewall layout | Height, corrugation, position and internal clear width | Sidewall component data mistaken for complete belt capacity | Finished pocket and clearance checks |
| Base belt | Grade, reinforcement, carrying face, underside and total thickness | Replacing by color and width alone | Full construction and operating limits |
| Route and joint | Pulley diameters, reverse bends, supports, joint location and take-up | Cleat strikes return roller or joint cannot be installed | Finished-assembly compatibility and fitting method |
| Cleaning and duty | Contact material, speed, load, chemicals and cleaning access | Unverified contact compliance or debris around cleat bases | Documented application approval and trial |
A table narrows the questions but cannot substitute for the original machine drawing. In an OEM quotation, every line should have a named specification or an explicit item awaiting engineering confirmation.
Two Practical Industrial Selection Scenarios
Scenario A — Inclined conveyor for sealed cartons
Consider a hypothetical packaging plant replacing a worn flat belt on a short incline. Cartons sometimes slide backward during frequent starts. Purchasing asks for a blue PVC belt with tall transverse cleats.
First, maintenance records the existing surface, belt underside, incline, carton dimensions, weight and start-stop duty. The design team checks whether the requested height will clear the loading point, discharge chute and every return roller. A tall cleat may arrest rollback but also push or catch a carton as it leaves the belt. They evaluate appropriate spacing against actual carton length and the required gap between successive products, not a generic pitch from a supplier chart.
The supplier can then propose a documented base-belt and cleat arrangement, with finished dimensions and joint approval. If the packaging line’s original issue is mostly tracking or pulley slip, that fault requires separate correction. Release a repeat order only after the sample passes the agreed operational trial, including startup and discharge.
Scenario B — Wet food line with corrugated sidewalls
Imagine a food processor using a cleated incline to feed unpackaged product to another machine. The existing belt accumulates residue beside the cleat bases and within sidewall folds. The buyer wants a replacement pocketed belt with a modified pattern.
The evaluation begins with food type, contact conditions, the site’s cleaning chemicals and procedures, and the destination market. The equipment team supplies clear pocket width, sidewall profile, return path and discharge geometry. QA and maintenance review access around each joint, seam and profile; a stronger material description does not guarantee better cleanability.
The production-approved replacement must have the applicable documentation for the selected complete assembly, not just a base polymer or color. The food conveyor belt cleaning guide covers inspection of edges, attachments and joints. After a trial, the facility checks product flow, belt fit, cleanability and its own required sanitation acceptance before approving routine supply.
What Should Buyers Send for a Cleated Conveyor Belt RFQ?
A useful quotation package is a drawing plus evidence of the operating problem. For a new installation or a replacement, include the following information:
- Machine and duty: conveyor model, drawing revision, incline angle, loading and discharge positions, conveyed product, weight or bulk behavior, speed and start-stop duty.
- Base belt: existing belt code or sample, carrying face and underside photos, width, finished endless length and reference, thickness, reinforcement or ply specification, and expected service environment.
- Cleats: type, material and profile drawing, measured height and thickness, pitch definition, edge offsets, orientation, and starting position relative to the joint.
- Sidewalls and guides: overall and clear width, sidewall height and profile, location, corrugation details, underside guide size and the mating machine groove where present.
- Route and installation: every contacted pulley diameter, reverse bends, return rollers, scrapers, guards, take-up travel, joint type and required installation access.
- Acceptance: quantities, permitted deviations, sample approval method, contact or hygiene documents where relevant, and responsibility for confirming the final belt against the OEM requirements.
LKBELT’s logistics and material-handling application page is useful context for the differing needs of package movement, transfers and flow control. For compact handovers, the conveyor belt transfer points guide explains why product size and transfer geometry matter; the presence of cleats adds a separate clearance problem to that transfer review.
Before ordering production quantities, compare the supplied drawing with the original belt or approved machine reference. Verify actual cleat and sidewall locations on the first finished sample. Qualified technicians should then use the OEM procedure to check tracking, joint passage, loading, discharge and clearances at the intended duty. Record the accepted drawing revision and sample result for repeat orders.
Frequently Asked Questions
What is the difference between a cleated and a rough-top conveyor belt?
A rough-top belt uses surface texture to influence contact with the conveyed product. Cleats are raised physical profiles that can separate products or support them against rollback. Selection depends on the actual handling requirement and machine geometry.
How do I choose cleat spacing for an incline conveyor?
Start with product size, flow behavior, loading pattern and the required product spaces. Define how pitch is measured, then check return supports and discharge clearance. There is no reliable universal pitch for every material and incline.
Do taller cleats always allow a steeper incline?
No. Product behavior, belt traction, pocket shape, loading, sidewall containment and equipment geometry all matter. Taller cleats can create return and discharge interference and must be approved for the full assembly.
Can a cleated belt also have corrugated sidewalls?
Yes. The finished design must specify the base belt, cleats, sidewall profiles, usable pocket width, joint and pulley compatibility together. A sidewall component’s listed bending value does not automatically approve the complete assembly.
Are white or PU cleated belts automatically food safe?
No. Food-contact suitability depends on the selected construction, any attachments and joints, the intended contact conditions and applicable documentary evidence. Color and polymer labels are not standalone approvals.
What should I measure when replacing a cleated belt?
Record the full loop length, width, thickness, carrying and underside surfaces, cleat profile and pitch, sidewall details, joint position and machine route. Include photographs and the OEM drawing where available.
Conclusion
A reliable cleated conveyor belt specification starts with how the product must move and ends with approval of the complete finished assembly. Cleat height and spacing alone cannot establish a fit: sidewalls, underside, pulley route, joint and discharge must be reviewed together.
For an LKBELT quotation, send the conveyor drawing, original belt details, cleat and sidewall measurements, conveyed-product information and installation conditions. This gives the supplier and your equipment team a concrete basis for reviewing a replacement or custom belt before production quantities are released.