
Belts for Edge Banding Machines
Identify the feed, pressure or drive position, then match the original component, belt faces and finished dimensions to your machine.
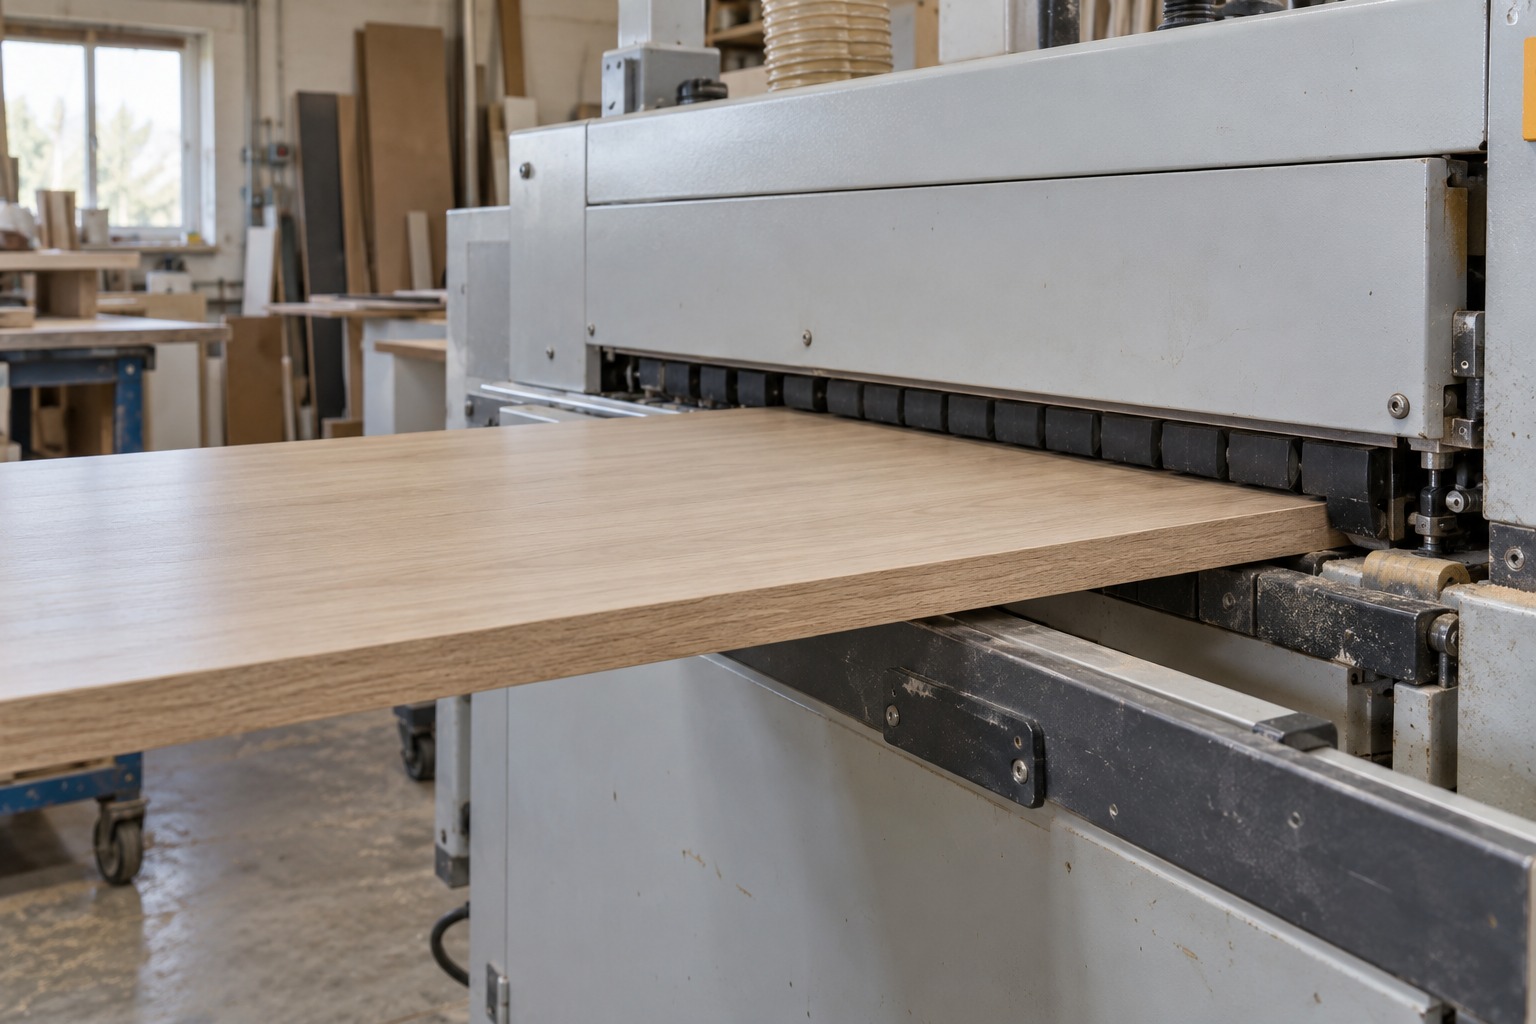
Start with the installed position
Feed or conveyor
Show how the panel travels and which face supports it. Include the installed view and original component reference.
Upper pressure
Photograph the panel-contact surface, profile and attachment features. Keep the panel thickness range from the machine documentation.
Drive & attachments
For drive parts include tooth/profile markings and the original code. Record pads, holes and guides on the drawing where present.
Read the belt from both sides
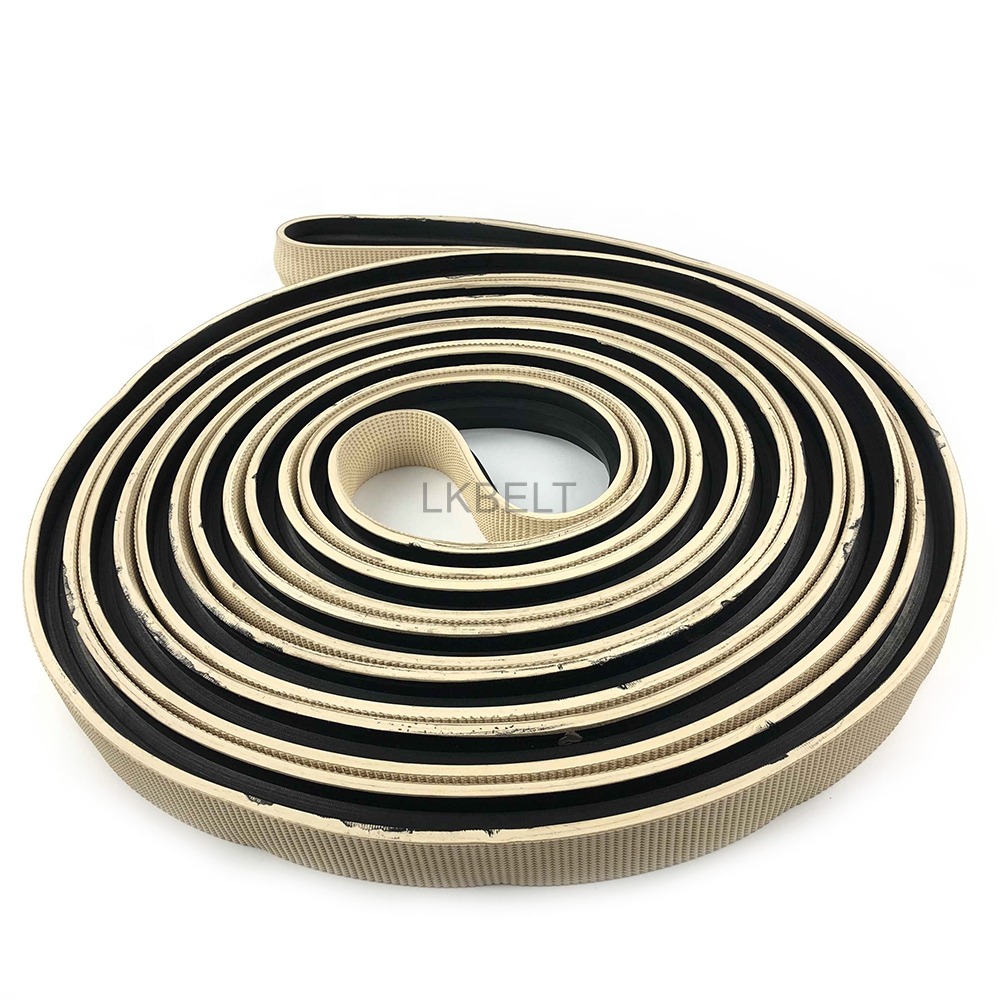
Furniture Edge Banding Machine Belt
Compare the overall form and original part reference first. Show the panel-contact face and installed route so the component can be identified alongside the drawing.
View Product Details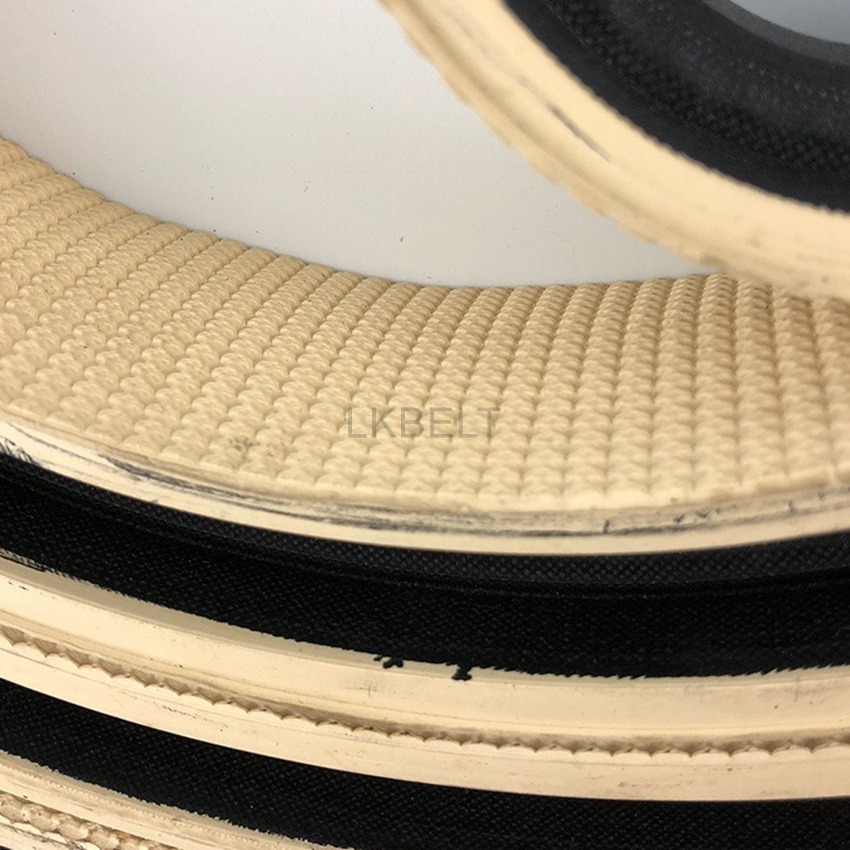
Specify the complete component around the panel
Furniture Edge Banding Machine Belt
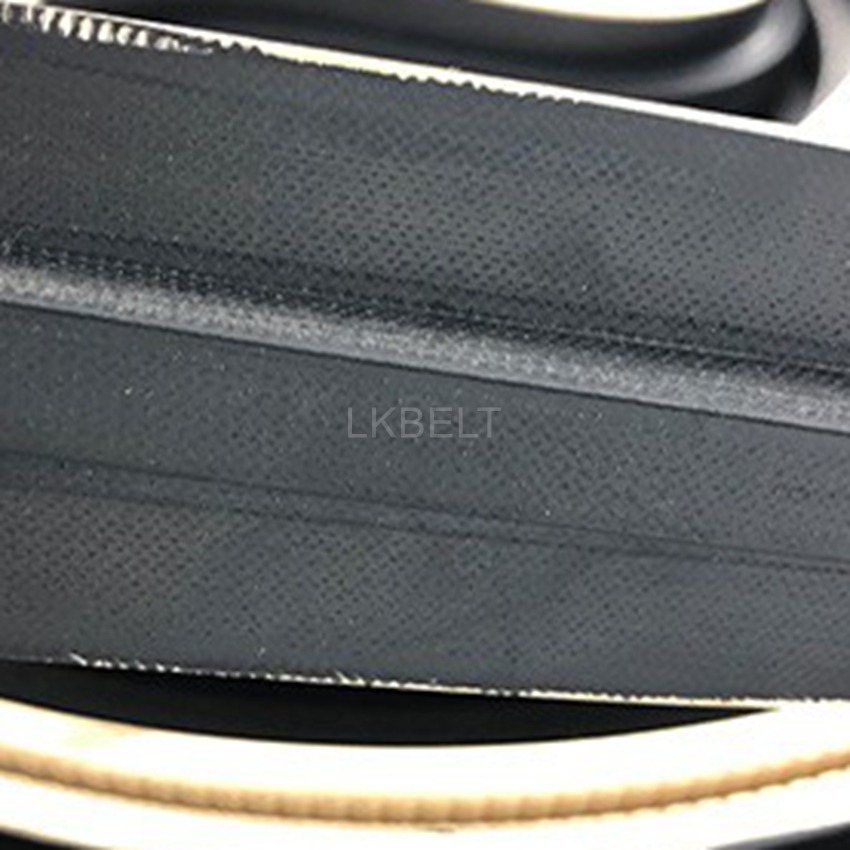
Rubber belt reference with distinct working facesThe existing product gallery shows the overall belt, textured light-coloured face and dark inner face. Use these views to identify the reference, then connect its profile and dimensions to the original drawing.
Explore this productContact surface: feeding and finish matter together
Panel material, finish and surface contamination influence the contact conditions. Describe the required handling and the surface quality you need to preserve, rather than specifying colour alone.
Belt body: fit and repeated flexing matter together
The component must follow the installed route while supporting its intended duty. Review the finished dimensions, construction and roller/path information as one record.
Inner face and attachments: geometry matters
A profile, tooth, pad or hole arrangement must match the installed component. Retain the reference drawing and pitch/profile details; a similar-looking overall loop is not a geometry check.
Balance contact, guidance and panel requirements
| Input | Why it changes the discussion | Review alongside it |
|---|---|---|
| Panel finish & contact face | A face chosen to move a panel also meets the finished surface. Grip, impressions and contamination observations belong in the same review. | Panel type/finish, contact-face reference, photographs and the actual machine contact arrangement. |
| Surface hardness request | Hardness describes one material property; it is not a standalone grip, wear-life or panel-marking result. | Material, texture, contact arrangement, workpiece finish and the agreed sample evaluation. |
| Profile or tooth geometry | Drive and guide engagement depend on more than total length and width. | Original profile/tooth reference, relevant drawing dimensions and the matching machine component. |
| Heat, adhesive & cleaning | The exposure may involve multiple materials and different contact durations. | Actual substances, temperatures and contact duration, plus the equipment maker’s maintenance instructions. |
| Repeated pads, guides or holes | Location and spacing influence how the component fits and runs. | A drawing with a defined datum, attachment method and repeated-feature spacing. |
Give the component its machine context
Panel contact
Describe material, finish and the face touching the belt. Record any slipping, impressions or contamination and when it occurs.
Belt & mounting
State width, thickness and full length or circumference with units. Include teeth, holes, pads, joints and markings where relevant.
Environment & maintenance
Record nearby heat, adhesive exposure, dust and cleaning products. Use the machine maker’s maintenance instructions.
Keep the belt, pads and drive details distinct
| Installed position or feature | What to identify | Useful reference photos |
|---|---|---|
| Feed / conveyor | Panel support and travel direction; installed component and machine part number. | Whole feed section, supporting face, belt markings and mounting features. |
| Upper pressure | Contact face above the panel, component profile and attachment arrangement. | Installed side view, panel-contact surface and original profile. |
| Drive component | Original drive-belt code, tooth/profile information and associated drawing. | Markings, tooth face, belt width and relevant pulley reference from the documentation. |
| Pads, holes or guides | Their role, spacing and attachment details; whether they are part of the same component. | A drawing or dimensioned view of repeated features and mounting points. |
Describe the exact component required. An edge banding belt, an individual pad and a drive belt should carry their own references in a replacement request.
Describe the workpiece and the contact face together
Panel and production context
Record the material, finish, dimensions and the range of panels processed on the machine. Show where the belt meets the workpiece and which face is visible in the finished product.
- Identify the panel-contact face and any original surface or pad reference.
- Describe slipping, impressions, contamination or uneven movement in your own words.
- Record whether the observation changes with panel material, finish or production conditions.
Component and environment context
Keep the workpiece observations with the installed component, dimensions and machine documentation.
- Photograph the contact face and the inner/profile side, including wear or buildup.
- Record nearby heat, adhesive contact, dust and the cleaning products used.
- Include the original part code and recent maintenance; do not assume a replacement belt alone will resolve an adjustment issue.
Make the replacement reference reproducible
| Record | How to describe it | Keep it separate from |
|---|---|---|
| Length / circumference | State units, inside/outside or other measurement basis, method and whether the belt was installed or removed. | Requested finished size versus an old belt that may be worn or stretched. |
| Width & thickness | Record measurement locations, instruments and any variation or visible wear. | A colour or overall visual resemblance to a replacement product. |
| Profile / teeth | Use the original drawing or code and dimension the actual cross-section where available. | Assumptions based on pitch or a photograph alone. |
| Holes / pads / guides | Show size, spacing, quantity and attachment details where relevant; identify the reference point. | A general machine name that does not identify the installed component. |
| Both belt faces | Label the panel-contact face, inner side, joint and markings. | A single overall photograph without position or scale. |
Show where the problem appears
| Observation | Information to send | Why it helps |
|---|---|---|
| Panel slipping | When and where it happens, panel material/finish, installed belt position and maintenance history. | Connects the observation to the component and process rather than just a belt name. |
| Impressions or marks | Contact-face photo, mark location, panel finish and whether the pattern repeats. | Helps compare the workpiece contact with the original belt/pad reference. |
| Edge wear or profile damage | Whole installation and damage close-ups, original code and dimension record. | Preserves both the physical reference and the location of the wear. |
| Buildup or contamination | Photos, material involved, heat/adhesive/dust exposure and cleaning instructions. | Adds the environment needed for a construction and maintenance discussion. |
Agree how the proposed belt will be evaluated
Define the sample requirement and acceptance plan for your machine before a production decision. Keep each observation tied to the same construction, reference and operating conditions.
| Review stage | What to agree | Record to retain |
|---|---|---|
| Reference control | Identify the exact component, profile, working face, drawing and machine position. | A reference that distinguishes belt, pads and drive components. |
| Dimensional check | Check length basis, width/thickness and any teeth, holes, pads or guides. | Defined datums, method and agreed tolerances. |
| Contact review | Use representative panel material and finish under defined machine conditions. | Feeding observations, marks/impressions, contact-face condition and the production context. |
| Environment review | Document the heat, adhesive, dust and cleaning exposure relevant to the request. | Actual conditions and any material-compatibility data required for the selected component. |
| Production decision | Confirm the reviewed component and any revised drawing details. | Sample identification, final specification and order reference. |
Discuss sample availability, the evaluation scope and any supporting test documentation with your inquiry. Keep the agreed method and criteria with the final drawing.
Keep the technical and purchasing details together
Technical reference to agree
Use one revision-controlled record for the belt you are requesting.
- Belt family and exact reference, construction, working face, underside and joint where applicable.
- Finished dimensions, measurement basis, tolerances and drawing revision.
- Machine position, operating conditions and any evaluation requirements.
Commercial details to request
Make the quotation specific to your quantity and destination.
- Requested quantity, sample requirement if needed, packaging and delivery destination.
- MOQ and sample availability for the actual request, not a general website assumption.
- Production lead time and transport time stated separately, with the requested date and delivery terms.
Before choosing a replacement
The belt looks similar — what else needs checking?
Compare the component code, cross-section, finished dimensions and mounting features. Both belt faces and the installed position are useful references.
What should I send for a slipping problem?
Record where it happens, the panel material and finish, contact face, when it began and recent maintenance. Include photographs of the installed component.
Which drawing details are useful?
Show the length basis, width and thickness, profile dimensions and any hole or pad spacing. Mark the working face and keep used-belt measurements separate from the new specification.
Let’s discuss your belt requirements
Share the machine reference, installed belt position, dimensions and quantity you already have.
Useful details to have ready
- Machine model and original belt or part reference
- Length or circumference, width and thickness, with units
- Working conditions and the reason for replacement
View the inquiry preparation checklist
LKBELT — APPLICATION INQUIRY PREPARATION SHEET

1. MACHINE & PART IDENTIFICATION
Application:
Machine brand / model:
Machine section / installed belt position:
Original belt code / part number:
Drawing number / revision:
Required quantity / replacement or new machine:

2. DIMENSION RECORD (state units, preferably mm)
Full loop circumference:
Measurement basis (inside / outside / drawing / other):
Condition (new specification / used belt / installed belt):
Measurement method and instrument:
Width / measurement location:
Thickness / measurement locations / wear variation:
Teeth, pitch or cross-section if applicable:
Holes, pads, guides or other features:
Requested finished dimensions (keep separate from measured used-belt values):
Do not apply a universal length deduction, stretch allowance or tension value.

3. OPERATING CONDITIONS
Material handled / product dimensions or weight:
Speed and source of value (manual / measured / estimate):
Contact temperature and duration:
Oil / water / glaze / chemical / abrasive exposure:
Duty hours and load requirement:
Roller or pulley information from machine drawing:
Maintenance / lubrication system specified by machine maker:
Observed issue, when it started and recent maintenance:

4. APPLICATION-SPECIFIC INFORMATION
Treadmill: running belt or motor drive belt; deck condition; surface and underside.
Coil processing: wrapper or slitting tension position; strip material and surface;
dry or oil operation; station arrangement; paired belts if applicable.
Edge banding: feed/conveyor, upper pressure or drive position; machine part number;
teeth/holes/pads and panel contact face.
Ceramic: actual process, product handled, belt function and existing code;

5. LABELLED REFERENCE PHOTOS / DOCUMENTS TO PREPARE
A — machine label
B — whole installation and belt position
C — belt top / contact face
D — underside / tooth face
E — joint and markings
F — width, thickness and length measurement method
G — original drawing or machine manual reference
Disconnect power before physical inspection and follow the machine service manual.

6. COMMERCIAL REQUEST
Delivery destination:
Requested quantity / sample requirement:
Required date:
Packaging requirement:
Ask for MOQ, production lead time and transport time separately.
Confirm the final product construction and finished specification before ordering.
Get a Quote
Send your machine reference, belt dimensions and operating conditions. Add your required quantity and any available drawing.
Get a QuotePrefer to contact our team directly? Contact LKBELT